For this recipe you will need a mixer or meat grinder – anything that can churn through very soft meat. If you don’t have a pasta machine, this recipe is great to do with a rolling pin (or wine bottle) as you actually want one giant rectangle that you can cut evenly into squares. You should leave the filling for as long as possible – many Italians make it the day before but I think at least 6 hours is enough. Start this recipe in the morning, make a day of it and you can have a comforting delicious feast on the table by 8pm.
I was unsure of how many portions to write up here in the recipe. I always like to make a lot because if you’re going to all that trouble, you can (as we have done) just keep that broth on the stove, let the pasta dry on a tray so they’re not touching each other, and continue to eat this dish for lunch and dinner in the following days. It also depends on how big you make your tortellini and how much filling you put inside. We made enough for 16 portions (two servings each for eight people and my tortellini were quite small) but the recipe below is for eight generous portions. You can adjust the filling slightly if cooking for more people by throwing in another 50g of cheese, 50g of mortadella, 50g of prosciutto and an extra egg.
I made over 400 in total but the last 100 I made the morning after. Just be sure that your pasta dough is wrapped tightly or in an airtight container in the fridge overnight and cut off any bits that may have dried out. The filling only gets better with time.
INGREDIENTS FILLING
2 cloves garlic
3 or 4 sprigs of rosemary
4-5 slices of pork loin (about 100-125g)
olive oil
100g of mortadella
100g of raw prosciutto
150g grated Parmigiano Reggiano cheese (and extra to grate on top when serving if desired)
1 egg
1 tablespoon finely chopped parsley
1 teaspoon fine salt
1 teaspoon pepper
1 teaspoon nutmeg
INGREDIENTS BROTH
1 large onion
6-10 cloves
1 large carrot
2 large stalks of celery
4 litres cold water
500g chicken on the bone (can be 2 separate pieces)
1kg meat (we used 520g meat on the bone and 550g muscle)
a handful of herbs (bay leaves, rosemary, oregano, thyme, sage)
approx 3 teaspoons salt
INGREDIENTS PASTA
100g per person of 00 flour
1 medium sized egg per person
pinch fine salt
*cooking for four people, for example, requires 400g flour and 4 eggs
METHOD
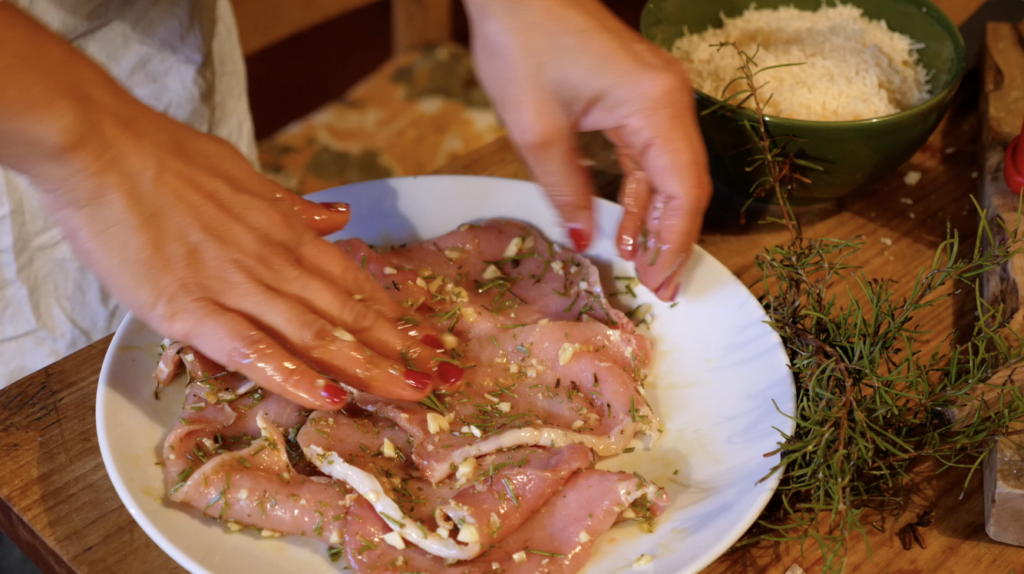
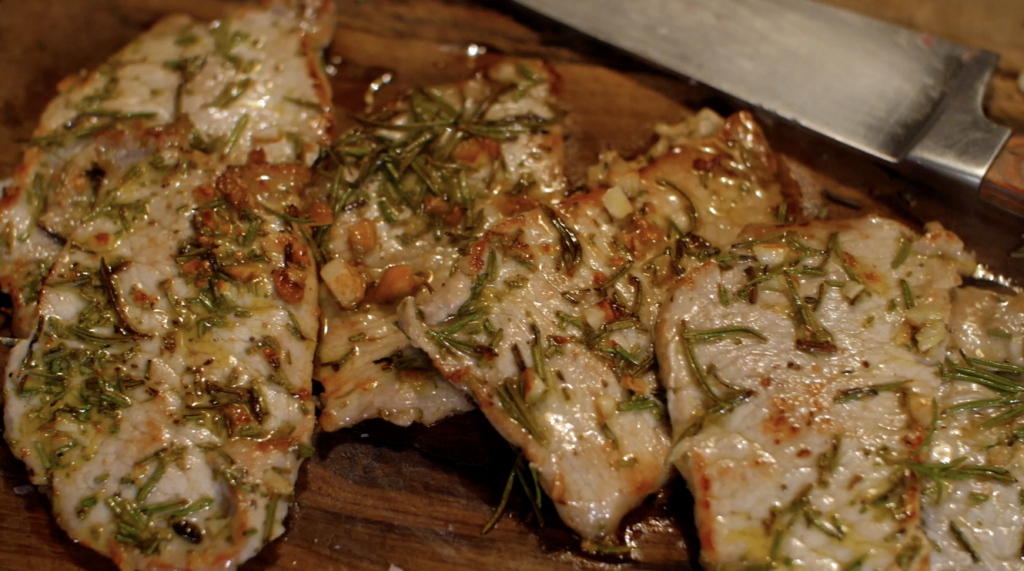
- The filling needs the longest time to develop in flavour, so let’s start with that. Finely chop garlic and rosemary and just leave the pork slices to marinate in them with some olive oil.
- Meanwhile grind your mortadella and prosciutto and grate your cheese.
- Now you can sprinkle a little salt on the pork slices, heat a large fry pan and cook them for a few minutes until lightly golden. Be careful not to burn the garlic or this flavour will run through everything. That said, the pork slices should be quite thin so you can cook them on quite a high heat. You should hear them sizzle when adding them to the pan.
- Now chop the cooked pork into small pieces to make it easier to grind and be sure you’ve chopped any large pieces of rosemary. Once minced, add the pork to the mortadella and prosciutto, put all three through the meat mincer again.
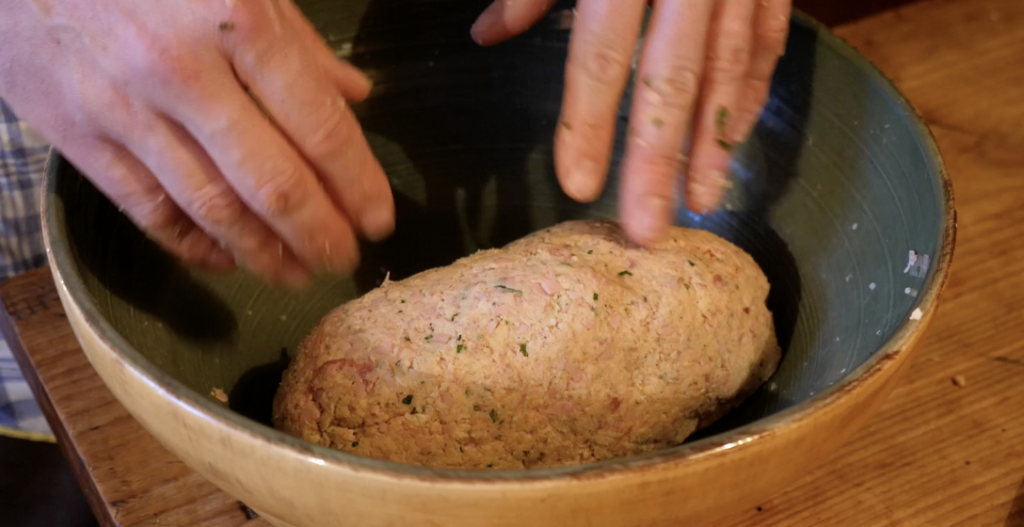
- Into a large bowl mix Parmesan cheese, minced mortadella, prosciutto and garlic/rosemary encrusted pork, egg, nutmeg, salt, pepper, finely chopped parsley. You can really squeeze and massage it well with your hands to ensure everything is properly amalgamated. Cover and place in the fridge to rest.
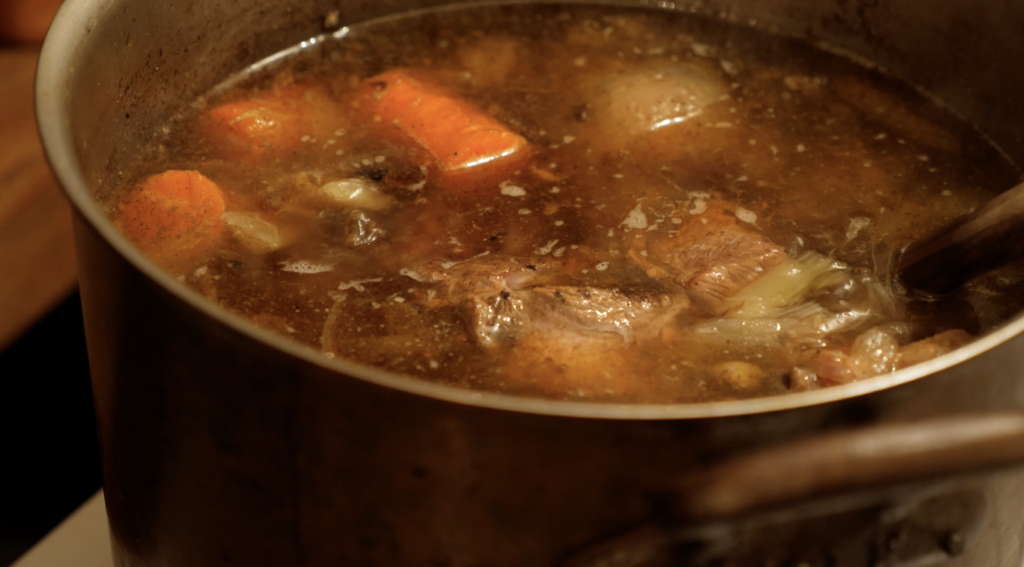
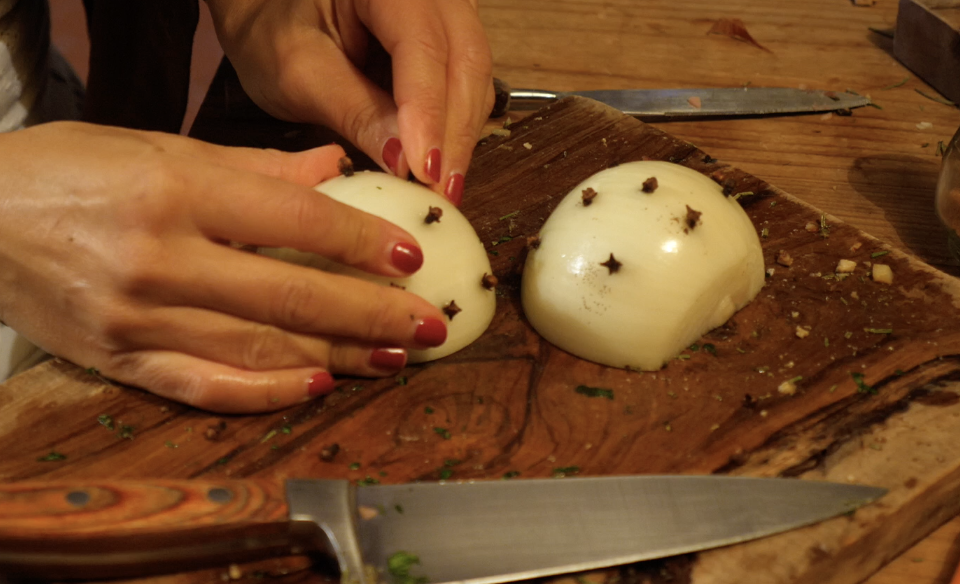
- Now the broth. Slice the onion in two and spike with cloves. Pan fry in a little olive oil until golden. I have made broth where I’ve also seared all the meat in a little oil first before covering with water but many ‘brodo’ recipes in Italy just tell you to put everything straight into the pot with cold water.
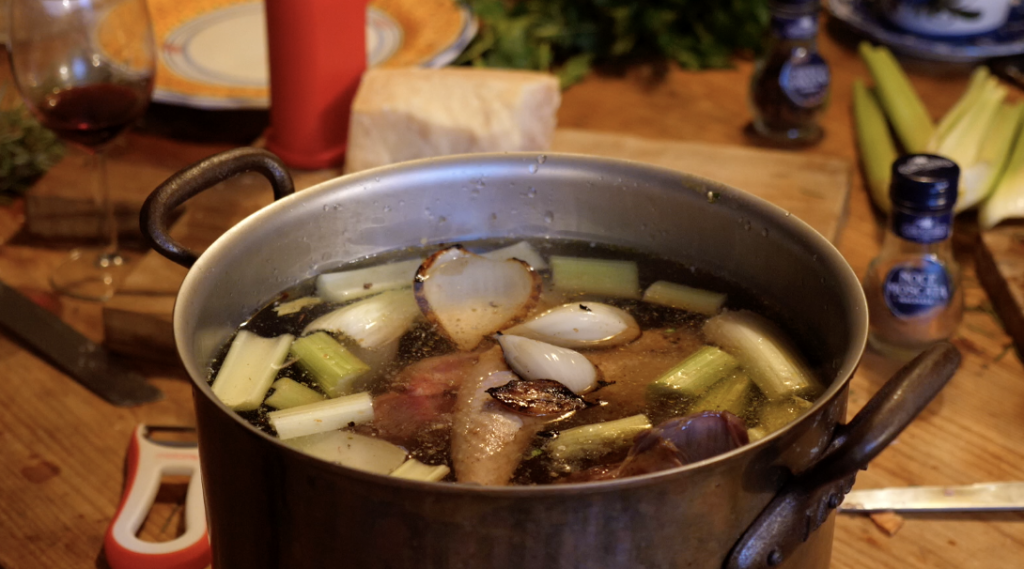
- In a large heavy pot, place carrot, celery, pan-fried onion, chicken with bones, beef with bones, herbs and 4 litres of water (or enough to cover everything). DON’T SEASON IT NOW. Bring it to the boil but then as soon as the water is hot, turn the temperature down to low and leave for two hours. After two hours, taste it and add a little salt. You will often see notes in recipes telling you to skim the surface intermittently to remove the grey scum, which can be fat or proteins, that might float to the top. I have never found any scum but obviously it depends on the type of meat you’re using. Skimming is mainly just for aesthetic reasons to give you a less cloudy broth. My sister, who is a nutritionist, is staying with us right now and she said any fat you see in this broth is very good for you.
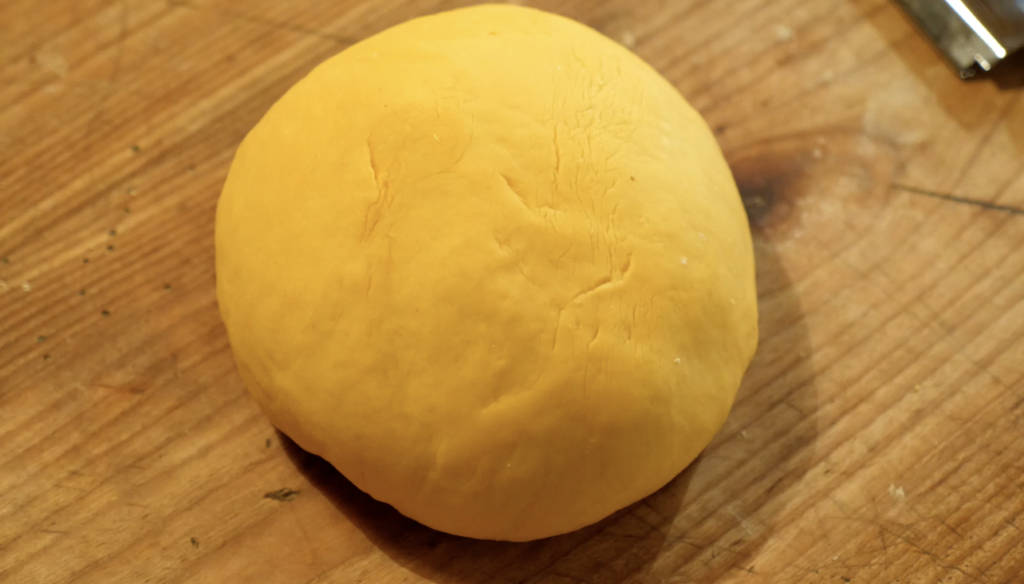
- Let’s begin the pasta. The reason Italians traditionally make it on a table instead of in a bowl is so that you can gradually mix in the flour and not mix in too much if not necessary. This allows you some flexibility because every time it can be different depending on the size of the eggs, the quality of the flour, the climate. But in an effort to save mess on a table, I have made pasta many times in a bowl without using the well method on the table and it’s been fine.
- You might like to whisk your eggs first and add a pinch of salt. Otherwise, you can just make a ring in your mountain of flour, crack the eggs straight in and slowly whisk in the flour with a fork. There are those who don’t salt their pasta at this stage but I think a teaspoon of fine salt is good. In the video, I use my fingers instead of a fork to incorporate the egg and flour but that’s just because I’m a very tactile person and I like to feel things. Once the egg is combined, work it with your hands until it all comes together into a rough ball. If you’re really worried about it being too dry, you can add a couple of tablespoons of water to bring things together.
- At this point, you’re ready for kneading. I would wash your hands now to clean off any dried flakes of pasta that could get caught into the dough and cause holes later on. Try to knead gently, without stretching the dough. You want to turn it around in circles, rather than folding it over on itself. You need to keep kneading until it becomes smooth and this could take from five to eight minutes. Once smooth, cover and leave aside (doesn’t need to be in the fridge) for 30 minutes.
- Now you can check on your broth. If two hours have passed, then taste and add salt if necessary. Just remember, all that cheese in the filling makes the tortellini quite salty even without the broth.
- Rolling out the pasta. If using a rolling pin, you can roll it out between two large sheets of baking paper to avoid needing to add copious amounts of flour. However, your dough shouldn’t be very sticky now that it’s rested. As you can see in the video, I just put it straight into the pasta machine without flour. If it is a little too wet, you can add some more flour. If using a pasta machine, put it through three times on the widest setting, folding each time. Then gradually go up to the thinnest setting. I prefer to do small pieces at a time because once your pasta strip is rolled out, it begins to dry. So we rolled out two strips, then distributed the filling and shaped into tortellini, then returned to the pasta machine to do another piece of dough. You could just cover the sitting strips but freshly rolled pasta is so much easier to work with so I prefer doing it like this in batches.
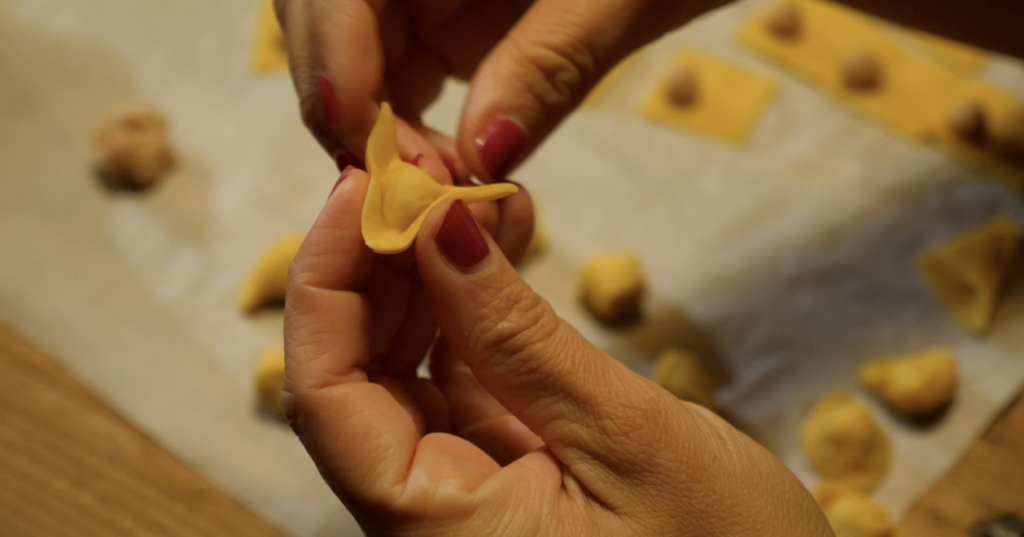
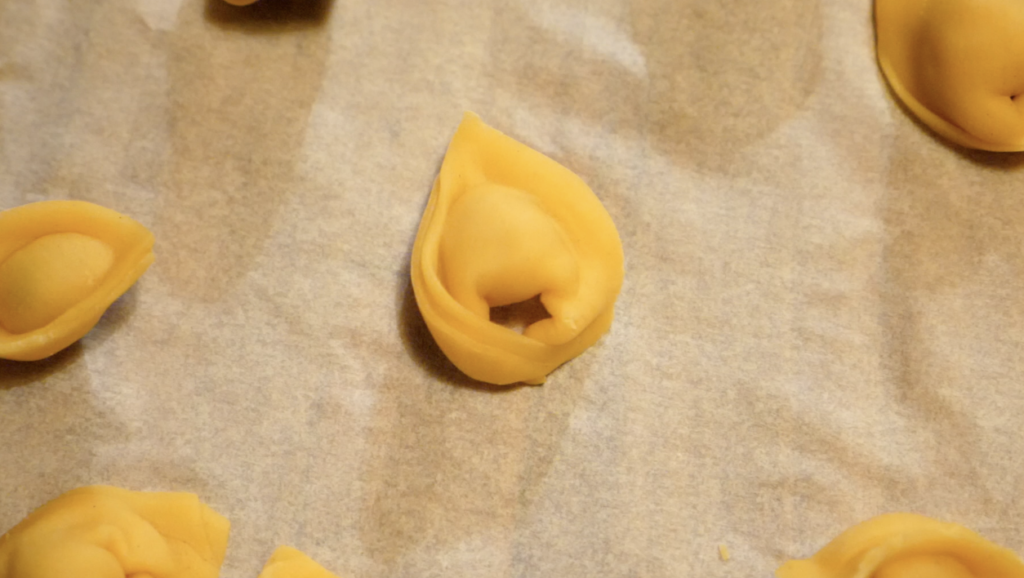
- Cut your pasta sheet into squares, each only a little wider than your index finger. Of course, you can make them as large as you want but the traditional tortellini are small. I like to roll the filling between my palms first because this makes it extra compact and it becomes easier to judge if your filling balls are all the same size. Fold the square in half into a triangle. Squeeze all the air out and press down around the little ball so he’s safe inside. Now squeeze either side to make the tortellini curve in on itself (photo below). Pull the corners a little and pinch them together into a little ring underneath. Sometimes I did this by wrapping the corners around my little finger. If by the time you get to the end of the pasta sheet, it’s a feeling a little dry, just dip your finger in water and run it over the edge of half the square before folding into a triangle. Make sure the tortellini are placed to dry on baking paper and with distance between each one so they don’t stick together. Don’t worry about covering them. It’s fine if they dry out once shaped.
- After four hours, your broth should be fragrant, dark and delicious. Strain it twice and then pour into two pots. One just enough to cover the amount of tortellini you plan to eat straight away and another to use later or add as backup broth if more is needed.
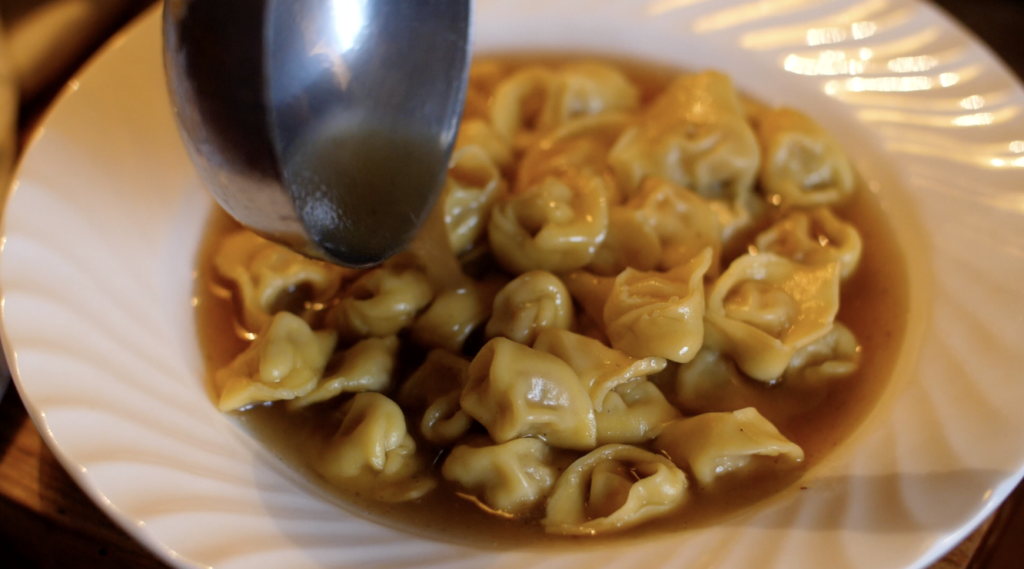
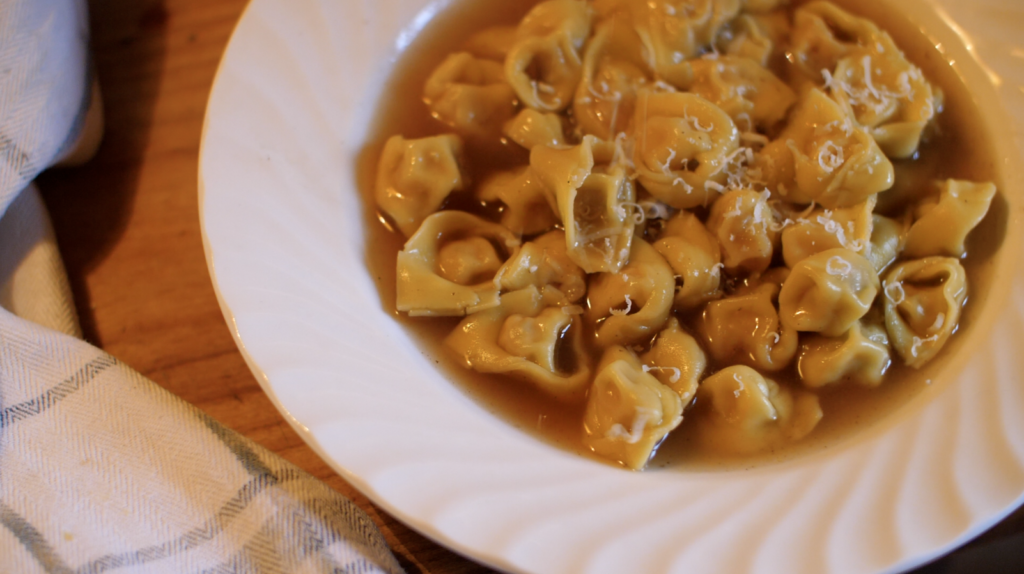
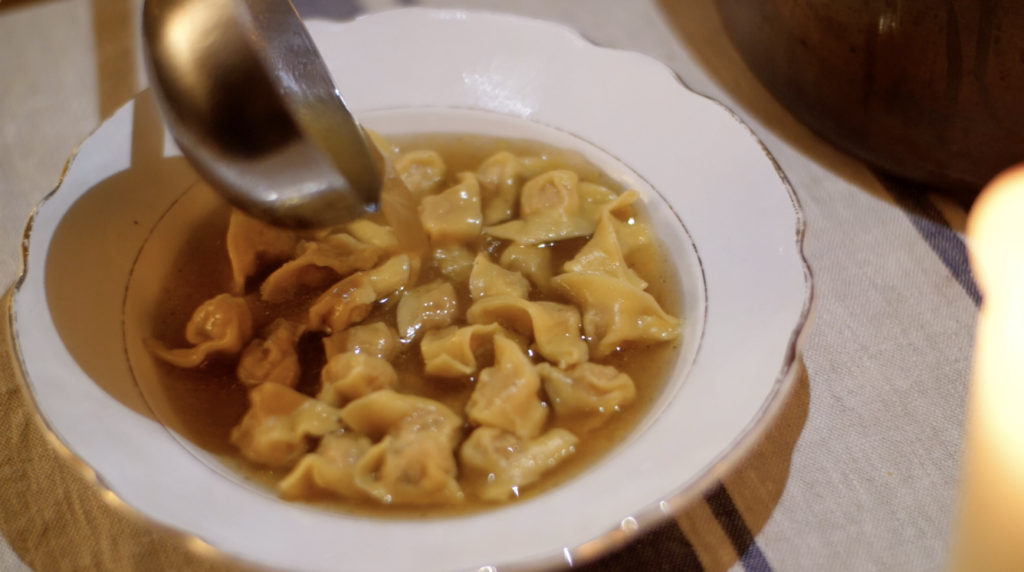
- Bring the broth to the boil and you can add salt, but I would taste first to check if it needs it. Add the tortellini and once they float to the top, they should take a minute or two after that. I find it’s easier to serve the pasta first with a slotted spoon to ensure everyone gets the same amount and then ladle in the broth over the top. Top with cheese and pepper and enjoy! I remove the remaining tortellini from the pot to stop them getting too soft and beyond al dente and just add the reheated broth later when everyone asks for seconds. And they will!!
*If you have leftover filling, these make delicious little polpettine on their own.