Hello. These two recipes are super simple so I’m sure you can follow them simply by watching the video but here are my measurements and the order in which I do things to ensure you have both dishes prepared economising on time and the hot oven.
Let’s talk about the quantity. If you would like to make a smaller portion (which you can see at the point in the video where I have the hummus in the plastic container), I sometimes just use two cans (2 cups when drained) of chickpeas, 1/2 cup of lemon juice, 2 garlic cloves and 1/2 cup of tahini. However, I recommend making the amount below. It’s so great for a quick easy lunch throughout the week or a nutritious way to satisfy hungry family members when dinner isn’t quite ready.
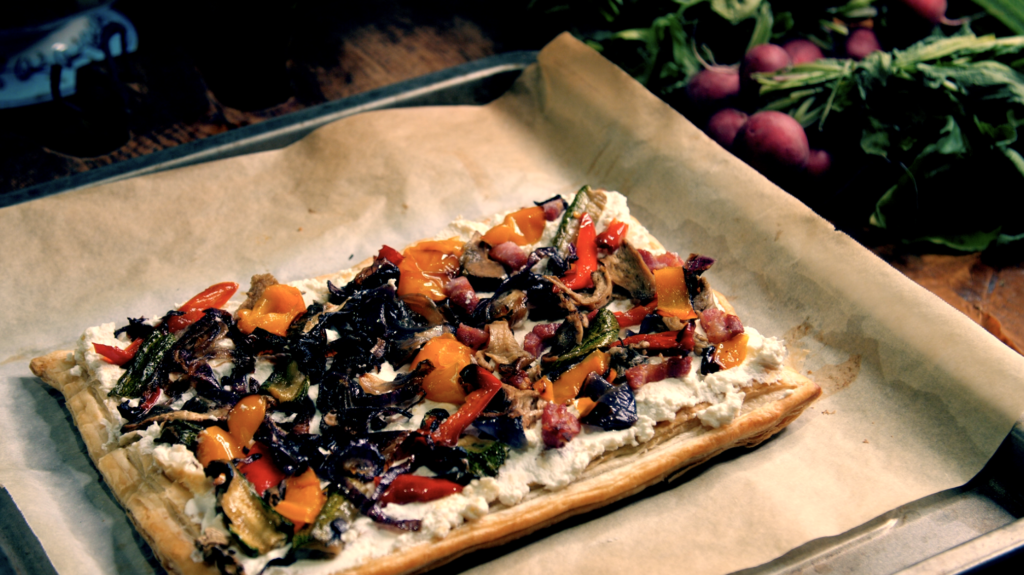
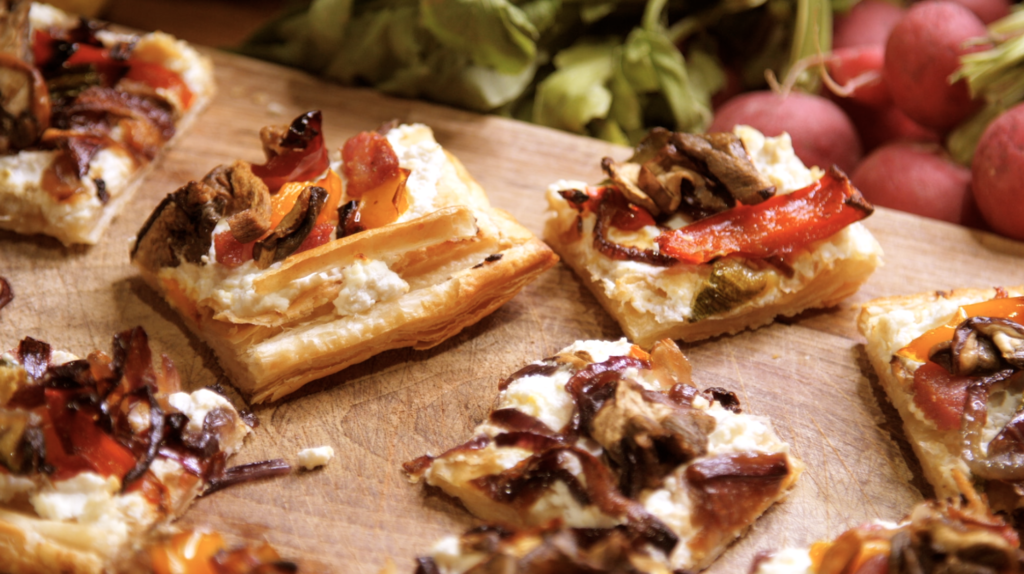
As for the stuzzichini, I didn’t show it in the video, but I actually made two trays of roasted vegetables to cover a second sheet of puff pastry. I like to layer on the ricotta quite thick but if you only have a little and just want to do one sheet, you could probably get away with just 125grams of ricotta.
INGREDIENTS: (I’ll put the hummus items in bold)
- FROZEN PUFF PASTRY
- YOUR PREFERRED VEGETABLES FOR ROASTING AND EATING RAW – FENNEL, ZUCCHINI, RED ONION, DRIED PORCINI MUSHROOMS, CAPSICUM, CARROTS, CUCUMBER…. WHATEVER YOU CAN FIND!
- 3 CLOVES GARLIC
- 2 MEDIUM LEMONS (1 CUP LEMON JUICE)
- SALT
- 3 x 285g CANS COOKED CHICKPEAS (after drained 3 cups chickpeas)
- 1 TEASPOON BICARB SODA/ BAKING SODA
- 1 CUP TAHINI
- 1/2 – 3/4 CUP OLIVE OIL
- CUMIN OR PAPRIKA
- 4-8 TABLESPOONS CHILLED WATER
- 400g RICOTTA
METHOD:
- First take the puff pastry out of the freezer because if it’s in a roll, it will take about an hour and a half to unthaw at room temperature without you impatiently forcing it and breaking it while it’s still partly frozen.
- Preheat your oven to 200 degrees Celsius 400 degrees Fahrenheit.
- Chop vegetables to be roasted that will top the stuzzichini pastry squares and place on a tray lined with baking paper. Also add the garlic cloves. Cover all with olive oil and a sprinkle of salt and pop in the oven.
- While they’re roasting, let’s soften our chickpeas. You could skip this step if you’re in a hurry and just rinse your chickpeas well. I like to boil them even though they’re already cooked because I’ve read that almost-mushy chickpeas give the smoothest hummus. I’ve also found that when chickpeas are a little hard, it’s more work for my blender. If you have a professional food processor, I guess this isn’t an issue for you. If you’re aiming for incredible velvety smooth texture, this boiling process in the bicarb helps loosen the chickpea skins, which can make your hummus a bit rough. So, for those of you aiming for that creamy dreaminess, put your drained chickpeas into a medium sized pot with enough water to completely cover them, add a teaspoon of bicarb and boil for about 20 minutes or until they’re plump, soft and the skin falls off easily if you take a chickpea in your fingers.
- While they’re boiling, you can start the hummus base. In a blender or food processor or Nutribullet, blend the lemon juice, with 2 teaspoons of salt and the 3 cloves of roasted garlic. While you’re getting the garlic from the oven tray, you can turn the other vegetables and put them back to continue roasting. If your blender is not so powerful, you may want to chop the garlic first as I did. If you don’t have time to roast the garlic, you could use raw garlic but I would only add one clove as the raw flavour is a lot less sweet and mellow than the roasted garlic.
- Add ice cubes to a cup of water to chill.
- Add tahini to the juice mixture in the blender, scraping it from the sides as you blend. You may find that your blender just grunts and protests because tahini is super sticky and thick. Add some of the chilled water to loosen it up and keep the overworked motor from heating everything up.
- Drain your chickpeas thoroughly to remove all traces of bicarb soda. If you want, you can now remove some or all of the skins from the chickpeas. Sometimes I find this easier to do under a little running water.
- Don’t forget your roasting vegetables! They’re probably ready now. They should be soft and slightly caramelised. Take them out but keep the oven on for your pastry in a bit. Puff pastry loves a nice hot oven, so feel free to turn up the heat.
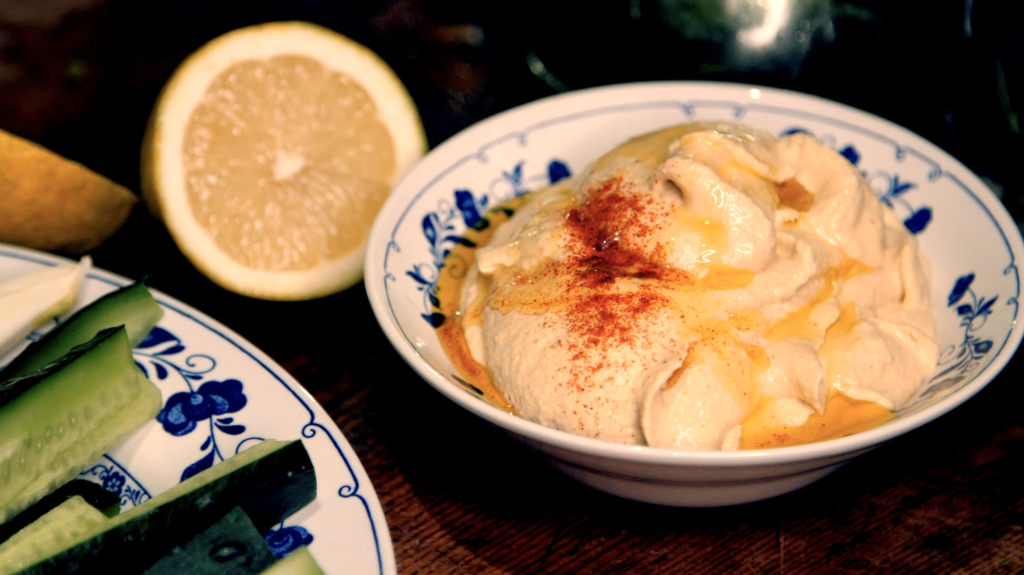
- Now add your chickpeas, olive oil and spices to the blender mixture and blend until smooth, adding more chilled water and olive oil if necessary to keep things blending or reach your desired texture. Taste it to see if you need to add more salt, more lemon, more paprika.
- Now roll out your pastry sheets and cut a border halfway through the pastry so that a little edge can rise up around the perimeter when it cooks. Prick the pastry with a fork so it doesn’t puff up too much and place the tray into the oven to cook until golden, turning after about 10 minutes to cook both sides.
- While waiting for it to cook, you can now peel, chop and plate the raw vegetables for the hummus.
- When your pastry sheet is golden on both sides, remove from oven and spread ricotta. Top with previously roasted vegetables (and dried porcini mushrooms if using – they just need five minutes to soak in water to hydrate) and put back in the oven for 5 minutes. I like to do this because it kind of sets the ricotta into the pastry and warms up the vegetables but if you’re in a rush, you could just cut it up and serve it straight away. THE HUMMUS LASTS FOR AT LEAST THREE OR FOUR DAYS BUT THE STUZZICHINI PASTRY SQUARES NEED TO BE EATEN THE DAY THEY’RE MADE. ENJOY!! Love Kylie