Hello, are you ready to become a little artisan chocolatier? I love all chocolate equally but I would advise using dark chocolate on outer shell because the truffle filling is already quite sweet and creamy. For the version you see in the video, I made the truffle ganache from about half milk and half dark, while for the dipping I made the quantity below twice to show the milk and dark options. The quantities are a bit approximate because it depends how thick you want the chocolate shell to be… and how much mess you make. If the idea of tempering chocolate and messing around with dipping feels too overwhelming for you, you could easily just roll the truffle balls in cacao or nuts or toasted coconut.
Try to use the best quality chocolate you can find or afford. If you want to check if it’s good quality, it should have ‘burro di cacao’ or cacao butter as one of the main ingredients.
INGREDIENTS
Truffle Ganache
270 grams chocolate, chopped
1/2 cup full fat cream (If not using another liquid to flavour like coffee or liqueur, increase this cream quantity to 1/3 cup)
1 tablespoon quality butter (14.2 grams)
1 teaspoon vanilla (extract, paste, essence whichever you can get your hands on)
1 teaspoon salt
OPTIONAL FLAVOURS
3-4 tablespoons of…. Vin Santo, rum, any other dessert liqueur, coffee…
2-3 teaspoons of spices (ginger, cinnamon, nutmeg) Note: I only used about one teaspoon in my video but I found the chocolate really masked the spices so the flavour was almost too subtle in my chocolates. So if you like a strong spiced hit, I would go for 1 tablespoon. You can always mix some in and then taste test. 🙂
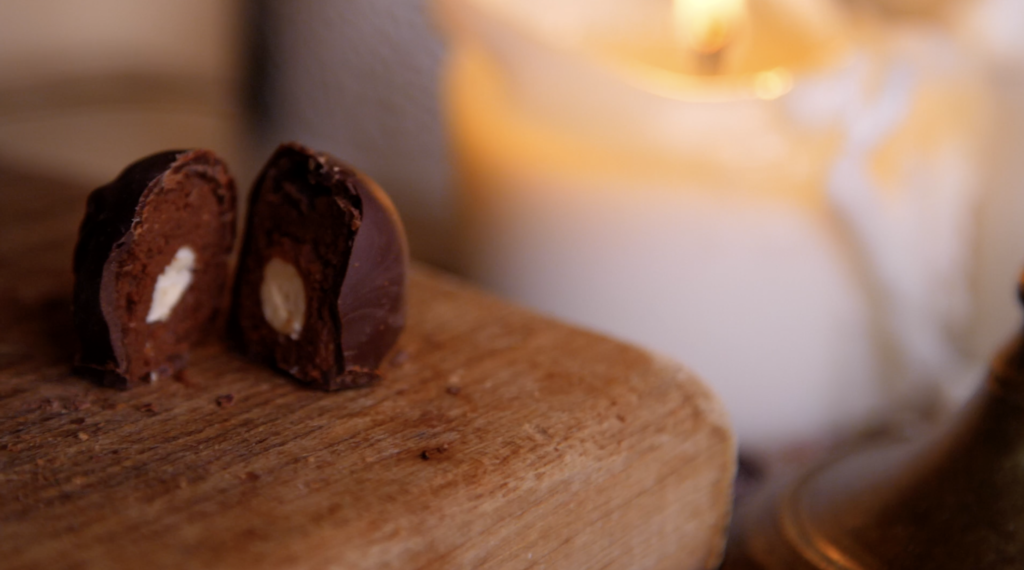
1/4 cup hazelnuts to put in the centre
Dipping Chocolate
Approximately 200-300 grams chocolate depending on how thick you want your outer chocolate shell to be
Optional Outer Coatings
1/4 cup cacao
1/4 cup desiccated toasted coconut
1/4 cup pistachios finely chopped
METHOD
- Put a small pot of water on the stove on a low flame and place a bowl on top to slowly melt your chopped chocolate and butter. Make sure no water can possibly splash up or get in somehow. Choose a bowl much larger than the pot. Gently stir until the chocolate and butter are melted almost completely, as shown in the video.
- If you don’t have enough room in the melting bowl, transfer your chocolate and butter melted mix into a mixing bowl and pour over the cream. It’s important at this stage to decide if you’re adding another liquid for the flavour. As noted above, the quantity of cream changes if not adding coffee or liqueur. Whisk until the cream, butter and chocolate form a velvety smooth ganache and marvel at how well things are going for you already! 🙂
- Add vanilla and salt. (I did this a step afterwards in the video)
- Now if you want to make two flavours, you can divide the ganache into separate bowls as I did. I’ve given approximate measurements because it really depends on your preference but I would say, don’t add so much liquid that the ganache loses its sticky fudge-like texture. Of course, a stickier ganache makes for a lovely creamy soft chocolate centre BUT it could become more difficult to handle when rolling later on. Your choice.
- Put some cling film over the bowl (or bowls) right down to touch the surface of the ganache so no condensation forms and put in the fridge to set for two hours.
- Once firm, find some plastic gloves (trust me, this helps if you suddenly have to stop rolling to answer the phone, or tend to a child, or change a camera setting 😉 and you need a quick clean hand) and start rolling. I find the lighter you roll, the smoother and easier it will be. If you squeeze and squash them too much, your body heat will make things a sticky mess.
- I find it easiest to now put the rolled ganache balls back into the fridge to firm up while we melt the chocolate.
- Okay, this is the hardest part. Tempered chocolate should snap easily when broken, not melt easily in the hand, have a glossy finish when set and generally just feel luxurious and professional. There is so much out there on how to temper chocolate with a microwave or with a thermometer but I didn’t have either so this is my way that is by no means expert but worked well for me. The seeding method means you melt 80 or 90% of your chocolate and just when all the little chocolate bonds are trying to reform and set, we mix in the remaining 20% unmelted chocolate, stirring to melt it with the heat of the other 80%. The test to tell if you’ve done it successfully is wiping a slick of chocolate on a square of baking paper and putting it in the fridge. In a couple of minutes it should have set with a glossy not muddy finish, remove easily from the baking paper without any residue left behind, and snap with a crisp sound when broken. You need to be particularly careful not to overheat dark chocolate. So without knowing the exact temperature, just melt it in the gentlest way possible as we did earlier with the chocolate and butter with a bowl over a low simmering pot of water. You definitely don’t want that water bubbling, just lightly steaming up and warming our chocolate. Water is the enemy. Some even say not to stir with a porous wooden spoon so that absolutely no potential moisture gets into that sensitive chocolate. Make sure the chocolate is all chopped evenly, giving it the best chance of melting in a balanced way. When it is mostly melted but still with some hard lumps, take the bowl off the heat and stir in the 10-20% remaining chocolate. The heat of their semi-melted friends will be enough to melt them as well but you’ll need to stir quite a bit. Have faith! If you don’t succeed in this seeding method, your chocolates will still work so it’s not for nothing. They just won’t be the perfect texture and shine but that’s an excuse to make these again. If it’s a total disaster, just cover them in nuts and no one will really know. 😉
- The dipping! Prepare a tray with baking paper to place your finished chocolates on. You only have a limited time once your dipping chocolate is melted before it cools and dries, so work fast. Take your ganache balls now chilled from the fridge. Dip into the chocolate using two forks so you can drip off the excess chocolate and then place swiftly onto the baking tray. If they become more like blobs than elegant cioccolatini, you can cut around the bottoms to clean them up when they’re halfway through setting.
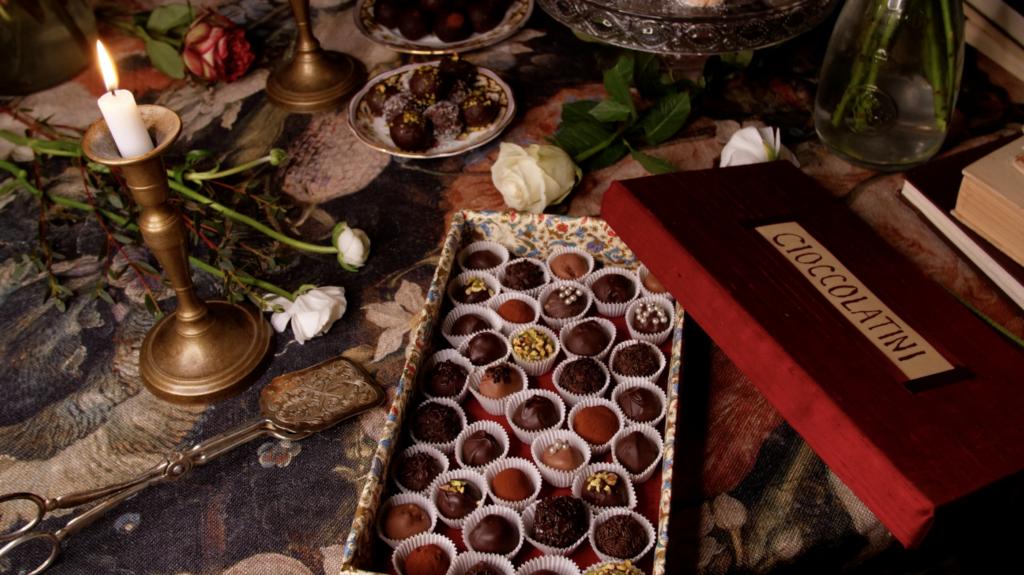
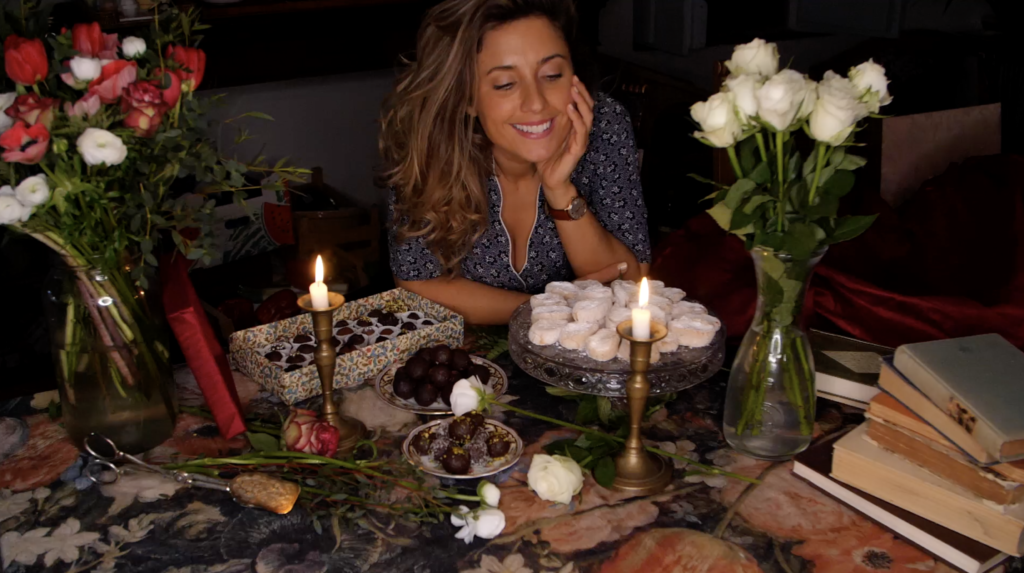
- You’re done! Now they should be able to sit out at room temperature to tempt people all holiday season. All you need now is a lovely chocolate box worthy of all your work…